Amazon Freebies & Deals 101
Deep dive into Amazon Freebies & Deals setup!
Before we begin...
Welcome to the Refract setup support document! This guide will walk you through the simple steps to start enjoying freebies and deals using Refract. There are really only a few steps before you are up and running! Don't miss them though - each one is crucial in order to have success!
Overview
Success
Proxy List Creation (Optional)
Proxies are essential when using multiple accounts for freebies. There are two ways to add proxies to the bot: creating a proxy list or adding them during account creation. In this guide, we will concentrate on adding proxies to a new proxy list. If you decide not to create a proxy list now, you will need to assign proxies to each account individually during the account creation process later on.
1.) The first step is to navigate to the proxy list tab.

Once in the proxy list tab, you will want to create a new list by clicking the
Createbutton in the top right hand corner. A proxy creation window will open up where you will name your list, choose a color (optional for ease of use) and paste your proxies.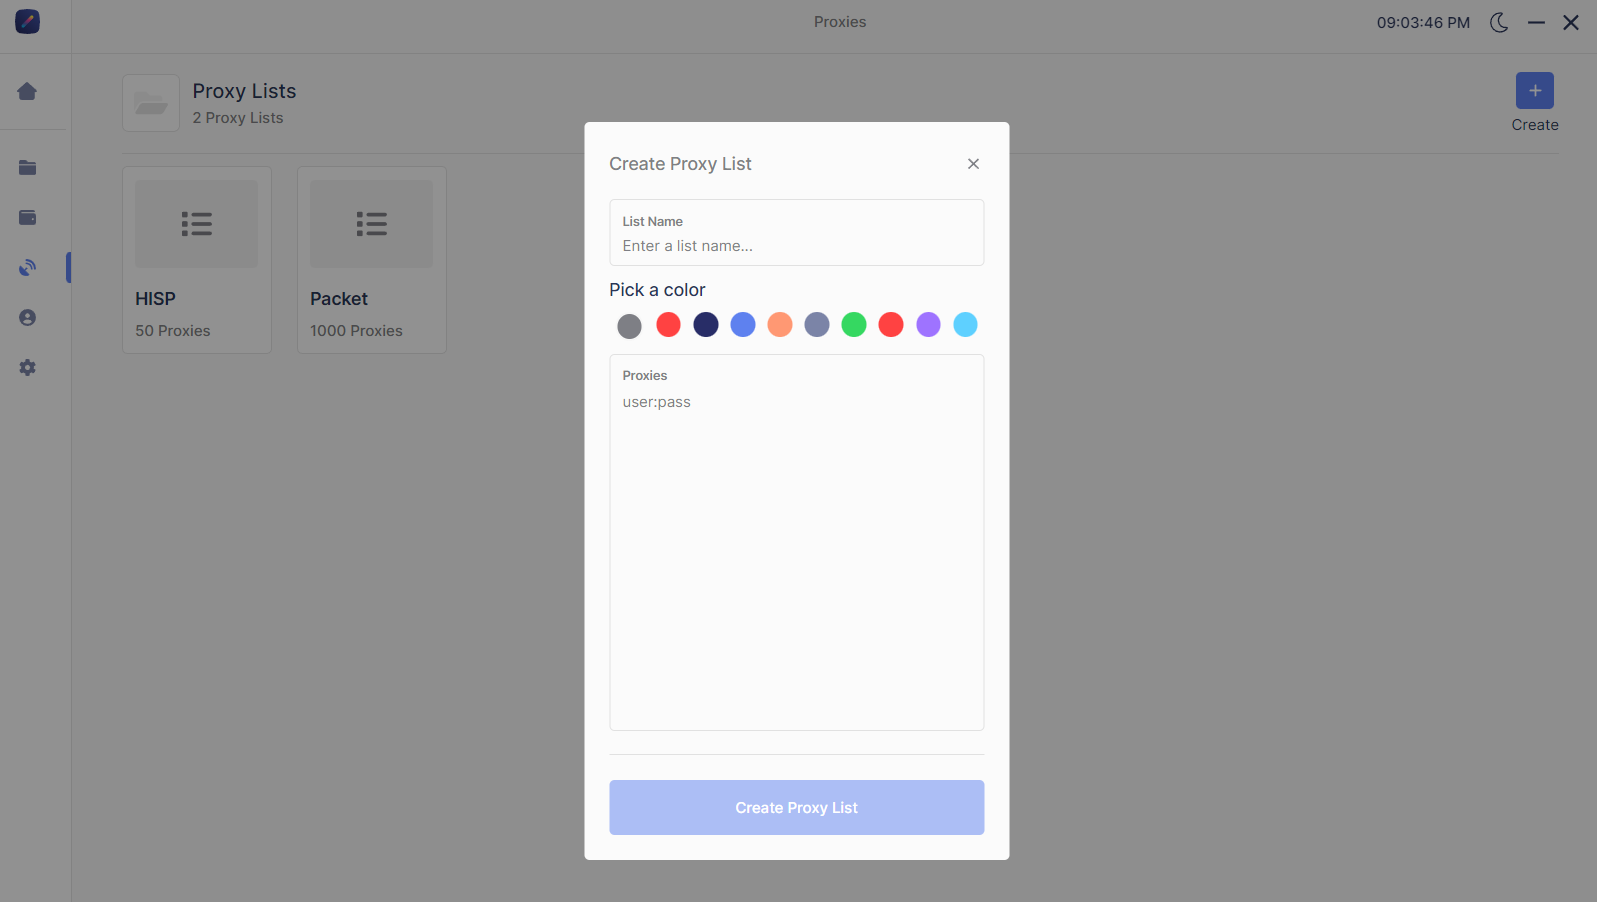
Remember: only one proxy per line, and proxies must follow ip:port:user:pass format. ip:port is also acceptable for IP authenticated proxies.
Adding Your Account(s)
Amazon accounts are the fuel for freebies. Having accounts properly setup is essential for success.
Account Requirements
Amazon Prime
Default address & payment method
Refract exclusivity! Do NOT run this account on any other software or you will encounter errors.
Adding Your Account(s)
Accounts can be added via the accounts tab. The accounts tab is located directly below the proxy group tab in the tool bar.
The first step is to navigate to the account groups tab.

To create a new account group, go to the account groups tab and click the Create button in the top right corner. A window will appear where you can name the group, choose a color (optional), and select the accounts. If it's your first time setting up, click "Create Group (0 Accounts)" and we will add your account to the group later.
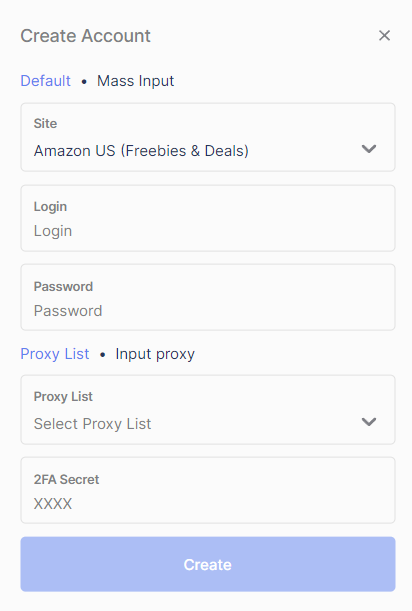
To add your account to the bot, click the "+" icon at the top of the new account group. A window will open where you can provide the necessary details.
For Amazon US (Freebies & Deals), select either Amazon US or Amazon US (Freebies & Deals) as the site. Both options will work.
Enter your Amazon email in the login box and your password in the password box.
Next, choose a proxy list or input a proxy. If you have a proxy list, you can choose to use it for your accounts' logins or leave it blank. If you don't have a proxy list, you can add an individual proxy by clicking "Input proxy" and pasting a single proxy into the bot.
Note: adding a proxy in the account step is only required if you didn't create a proxy list previously. Assigning an individual proxy to a specific account can provide more control over your setup, but is not necessary.
The 2FA secret box is for 2FA authentication keys. If you do not have this setup, do not worry and leave this box blank.
Finally, click create.
Logging In
After your account has been cretaed, you will need to login to that account. To login to that account, simply click the account to select it. To select multiple accounts, hold the
CTRLkey of doCTRL + Ato select all accounts.Once your desired accounts have been selected, click the lock icon to login to the account(s).

Task Group Creation
After your accounts are ready to go, it is time to create your task group.
The first step is to navigate to the task groups tab.

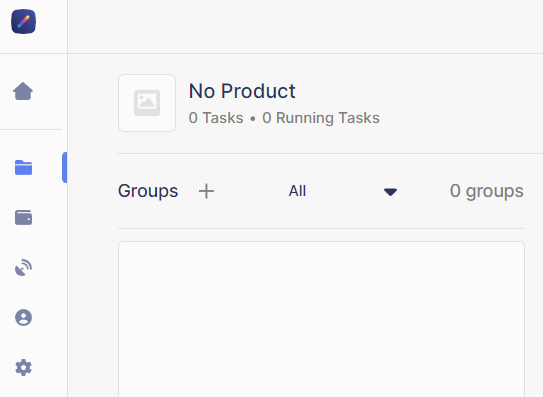
Once in the tasks groups tab, you will want to create a new group by clicking the
+button near the top of the groups section.
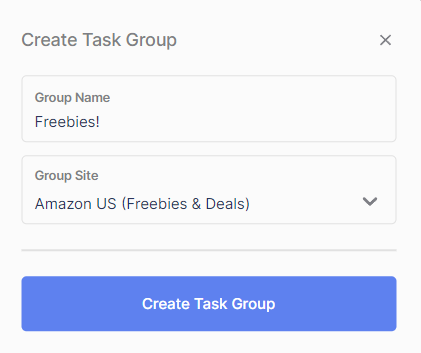
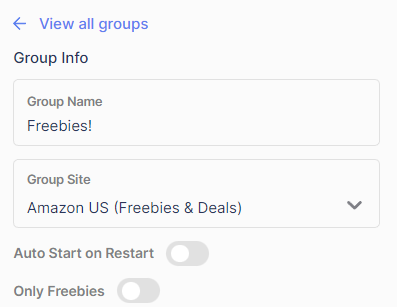
After click the creation button, a window will open where you can name your task group and choose the site. In this case, the group site should be
Amazon US (Freebies & Deals)
Task Creation
The last step before you rake in these free products is to create your tasks.
First, click the
+Add button near the top right hand corner of the task group.

A task creation window will open where you will choose your proxy list, account, and delay.
Use Account Proxyshould be enabled if you added proxies directly to your account in account creation. Otherwise, select the proxy list you previously created.Next select your account(s) you want to run. You can also choose to run an entire account group.
Finally, choose your delay and task quantity. Delay can range from 0 to 3500. If you are new, leave it at 3500. Task quantity should always be 1. Same for item quantity.
After you have all of the above set, create your tasks.
Success
Congrats! You are ready for free products. The last step is to start your tasks by clicking the
Startbutton. All tasks should showWaiting for Product. This is a normal step, and one where you will see your tasks at quite often.
Deals
Refract doesn't only just support free products, you can also run for a multidate of heavily discounted products.
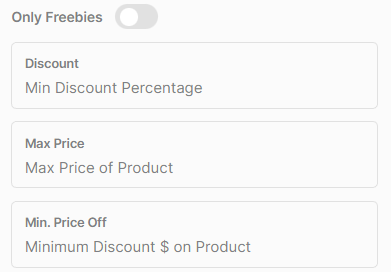
To setup for these deal, simply disable the
Only Freebiestoggle in the task group.
Min Discount Percentageis the minimum discount you want to go for. For example, if you want products that are only 90% off or above (including freebies), put 90.Max Price of Productis the final TOTAL price (including shipping and tax) of the product. If you want the max price to be $5, put 5.Min. Price Offis the minimum price (in dollars) you want off from the product. If you only want products that are $100 or more dollars off, put 100.
Not all three of these are required. You can only set the for one, two, or all three. Feel free to adjust to suit your needs.
Why am I not hitting?
Below is a checklist to ensure you have everything setup properly. If you have everything correct, please open a ticket in the support server and we would be happy to further assist you.
Last updated
Was this helpful?