For the complete documentation index, see llms.txt. This page is also available as Markdown.

Settings

The bot's Settings tab has five sections: General, Freebies, Harvesters, IMAP Logins, and 2FA Codes. This page covers General, Freebies, and 2FA Codes. Harvesters and IMAP Logins have their own dedicated guides, linked below.

General

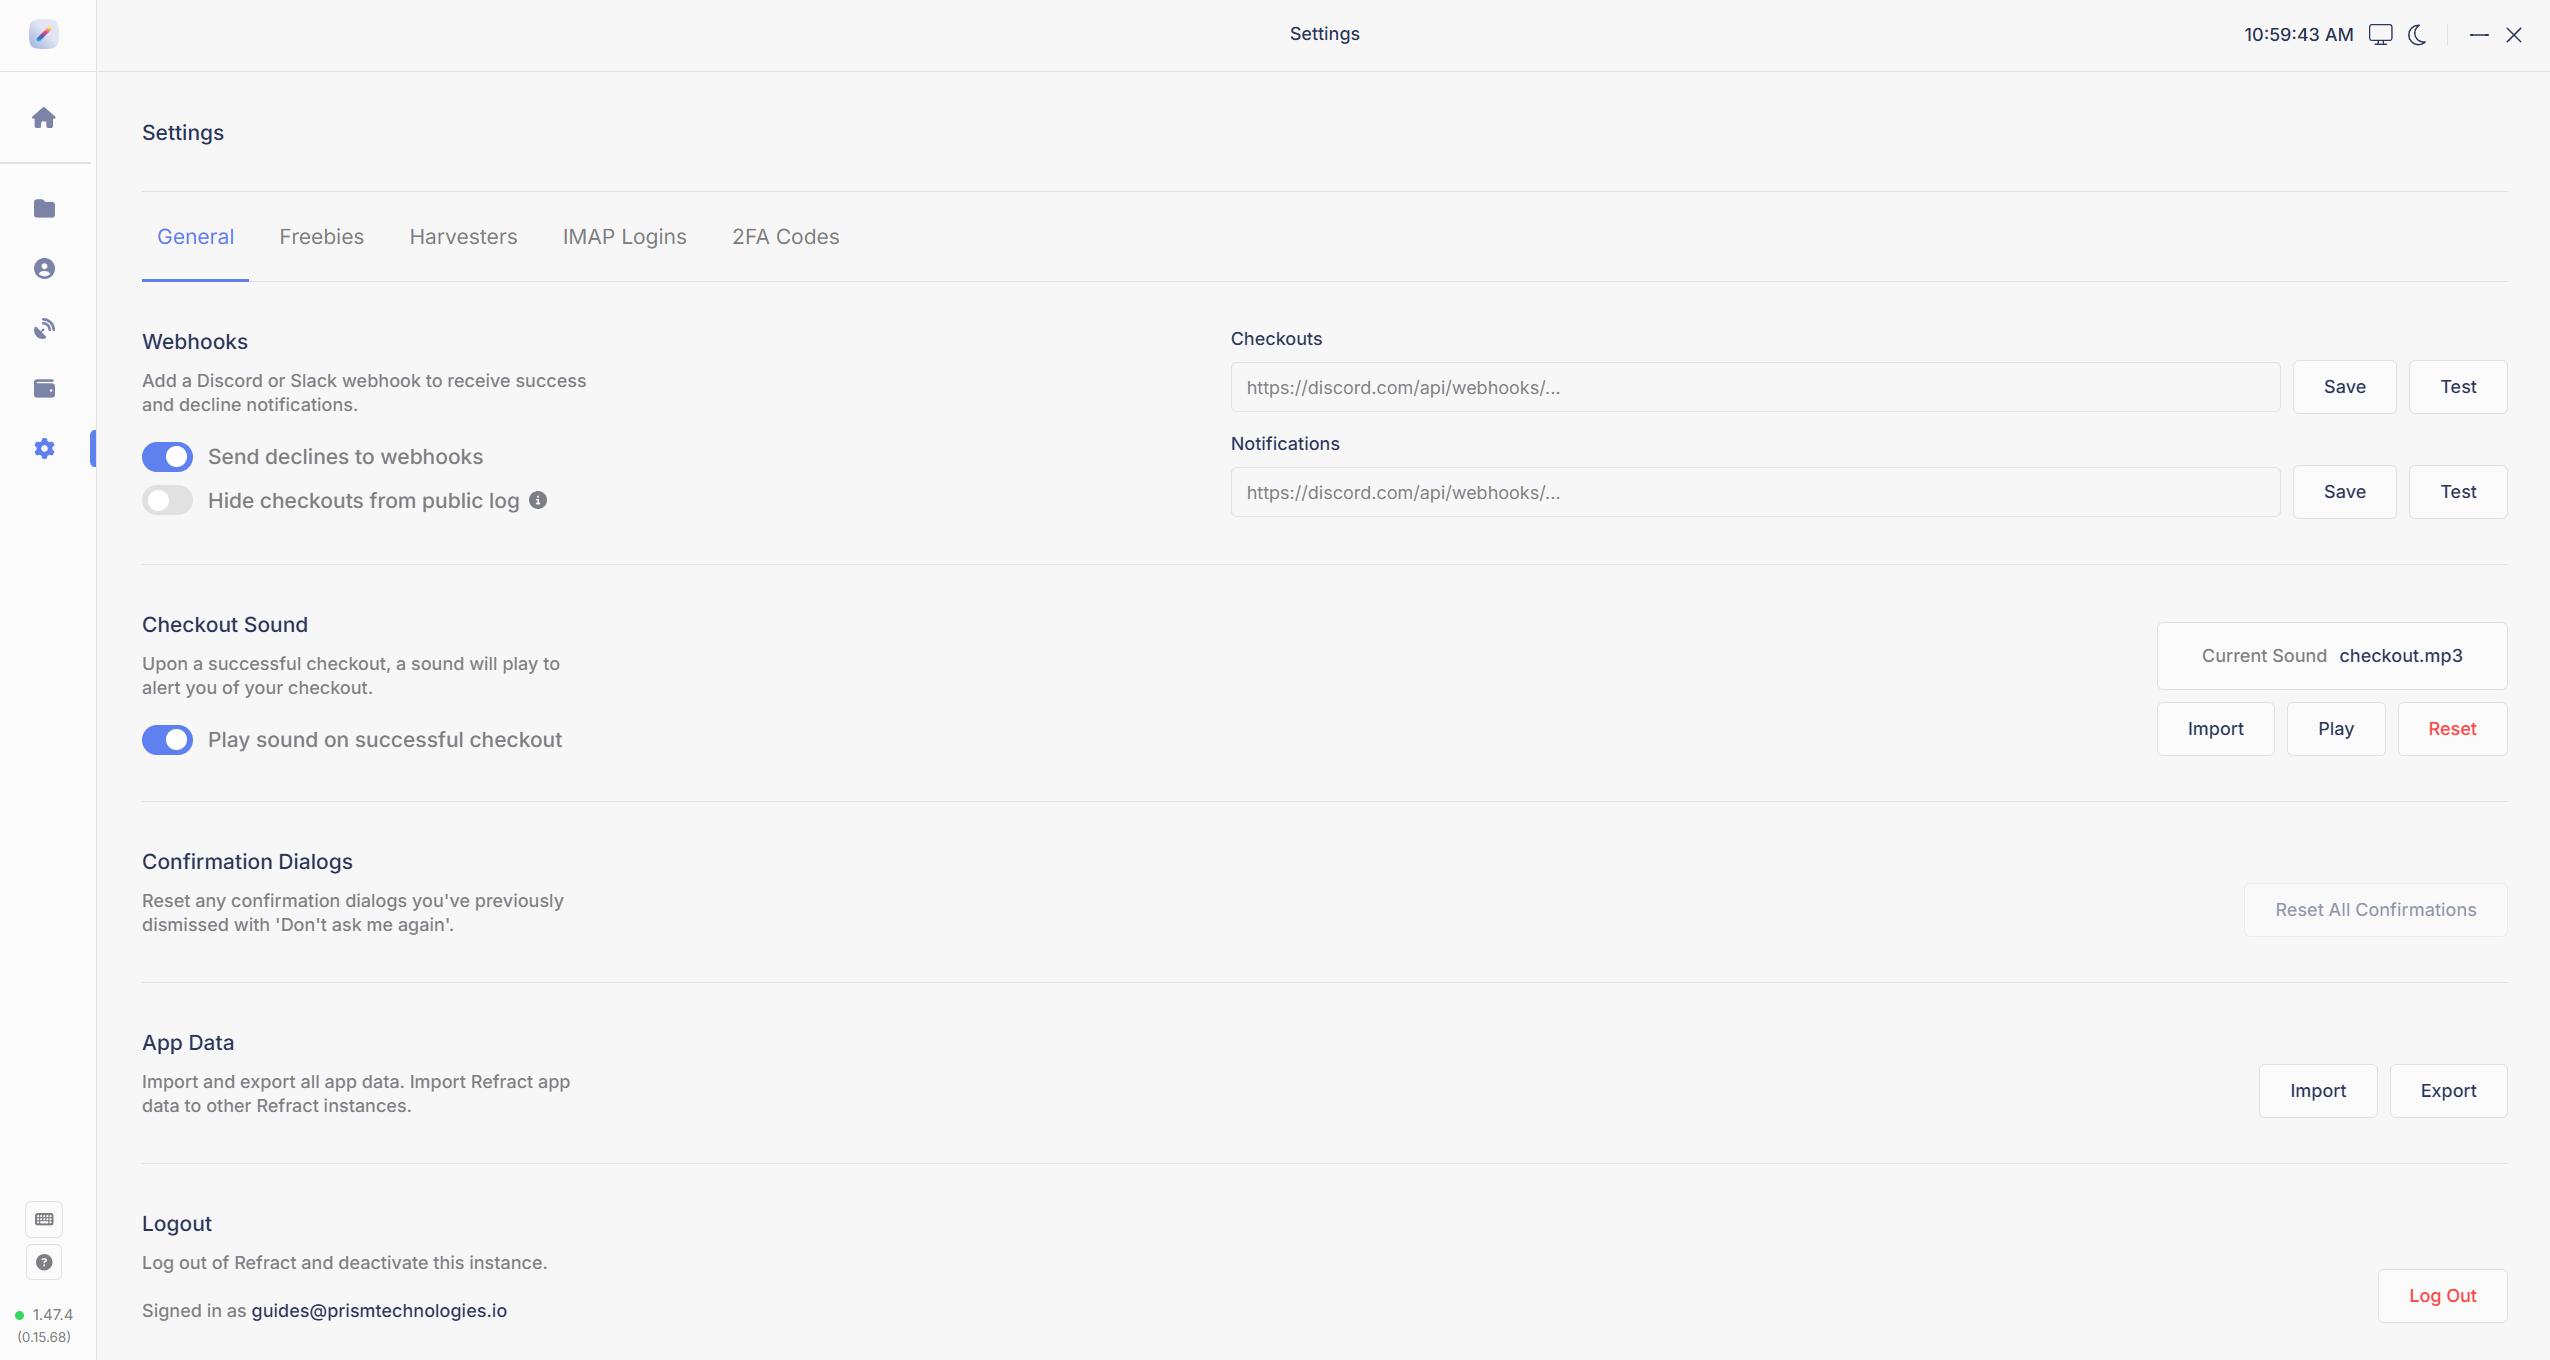
The General tab of bot Settings
The General tab: webhooks, checkout sound, confirmation dialogs, app data, and logout.

Webhooks

Add a Discord or Slack webhook to receive notifications from the bot. There are two webhook fields:

  • Checkouts: receives your success and decline notifications.

  • Notifications: receives bot alerts that may need your attention, like Shape passing but the product going out of stock, 3DS payment verification prompts, or Walmart checkout URLs for accounts without SMS verification (see SMS verification at checkout).

Paste the webhook URL into the field, click Save, then click Test to confirm it posts.

Two toggles control what gets sent:

  • Send declines to webhooks: with this on, declines post to your webhook alongside successes.

  • Hide checkouts from public log: keeps your checkouts out of the public checkout log. Note that this is not absolute: certain popular products will always be shown in the public log at our discretion.

How to create a Discord webhook
  1. Create your own Discord server by clicking the + (Add a Server) icon in Discord and following the prompts.

  2. Open your server's Server Settings and go to the Integrations > Webhooks tab.

  3. Click Create Webhook (or New Webhook), choose the channel it should post to, and copy the webhook URL.

  4. Paste that URL into Refract and click Save, then Test.

How to create a Slack webhook
  1. Create a Slack workspace (or use one you own).

  2. From the workspace's app directory, add the Incoming Webhooks application.

  3. In the app's settings, pick the channel it should post to and click Authorize.

  4. Click generate in the Webhook URL box, copy the URL, paste it into Refract, and click Save, then Test.

Checkout Sound

With Play sound on successful checkout on, the bot plays a sound every time a task checks out. The current sound file is shown on the right.

  • Import a custom sound (MP3 format).

  • Play previews the current sound.

  • Reset returns to the default checkout sound.

Confirmation Dialogs

If you have dismissed confirmation pop-ups with "Don't ask me again," clicking Reset All Confirmations brings them all back.

App Data

Export saves all of your app data, and Import loads it into another Refract instance. This is how you move your full setup (settings, accounts, profiles, proxies, task groups, and saved sessions) to a new PC or server.

Move everything to a new device

We get asked this a lot. Here is the whole process:

1

Export on your current device

In Settings > General > App Data, click Export and save the file.

2

Move the file to the new device

Get the exported file onto the new machine however you like: USB drive, cloud storage, or a direct transfer.

Emailing the file to yourself is the easy option, especially when the new machine is a server you only reach through a remote session, and plenty of people do it that way.

3

Sign out of the current device

Click Log Out at the bottom of Settings, or sign the device out from the dashboard's Devices tab. This frees the instance so the new device can use it.

4

Sign in on the new device

Install Refract on the new device and log in with your account.

5

Import the file

Go to Settings > General > App Data, click Import, and choose the file you moved over.

Logout

Log Out logs you out of Refract and deactivates this instance, freeing it up so another device can use it. The signed-in account email is shown here too. If you are chasing a "Max Instance Limit Reached" error, this and the dashboard's Devices tab are the two ways to free an instance:

Devices

Freebies

The Freebies tab holds the ASIN/Keyword Blacklist for Amazon Freebies & Deals.

The Freebies tab with the ASIN/Keyword Blacklist
Comma-separated ASINs and keywords. Click an entry to remove it.

  • Add ASINs or keywords you never want checked out again, comma-separated: ASIN,keyword,ASIN,keyword.

  • Click Add to save them to the blacklist.

  • Click an existing entry to remove it from the blacklist.

Amazon Freebies & Deals 101

Harvesters

The Harvesters tab is where Target Shape cookie harvesters live. It has a full guide:

In-Bot (Shape Generation)

IMAP Logins

The IMAP Logins tab connects your email so the bot can auto-submit one-time codes. It has a full guide:

IMAP

2FA Codes

Click Open Window to manually open the 2FA codes window. It lists every email and task currently waiting on a code, and you can filter by site or recipient.

The 2FA Codes tab with the Open Window button
The 2FA Codes tab. Open Window brings up the codes list, filterable by site or recipient.

Seeing code requests here does not mean IMAP is broken. The codes window always shows the emails and tasks that need codes, even when IMAP is connected and submitting them successfully. Use this window when you want to see or enter codes manually.

Last updated

Was this helpful?